make it minc! 3 easy ways....valentine style!

ahhh....love is in the air.
the season of pink and red.
i love it.

valentine's day is always that special time to indulge in pretty things, chocolate things...and lots of pink and red things!
and with the heidi swapp minc machine...it is even easier to celebrate this awesome holiday with touches of pinks and reds in all their foil fabulousness.


today i want to share how easy it is to transform some of my favourite minc products (that are all now available at michaels) into valentines flair that will truly captivate your heart.  because yes, they are just that pretty. it's true!


first, i used my minc machine along with red and pink foil to create beautifully foiled banners.  


the pennant banner is the 'minc mini banners' kit.  
i simply minc'ed the banner using light pink foil.  once it was transformed i added the pennants onto the string that comes inside the kit.  so easy and so cute!

the valentine banner was created using the minc alphabets.  i adore the font and the polka dots. again, simply ran through each alpha with red foil inside my minc and then used my sewing machine to stitch the banner together.  i then attached to my chicken wire frame using mini clothes pins. i love the way it shines!

next....it would not be valentines day without a chocolate treat!


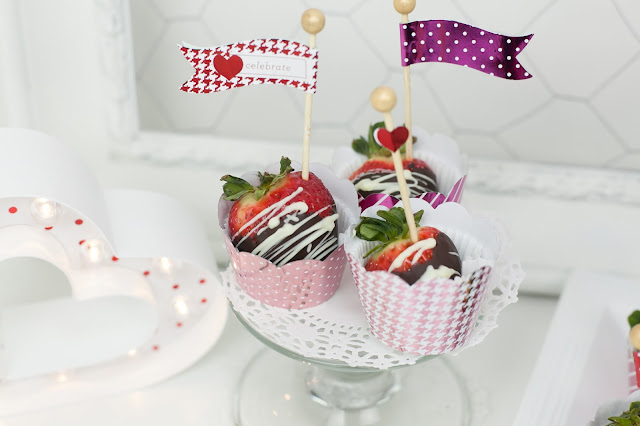
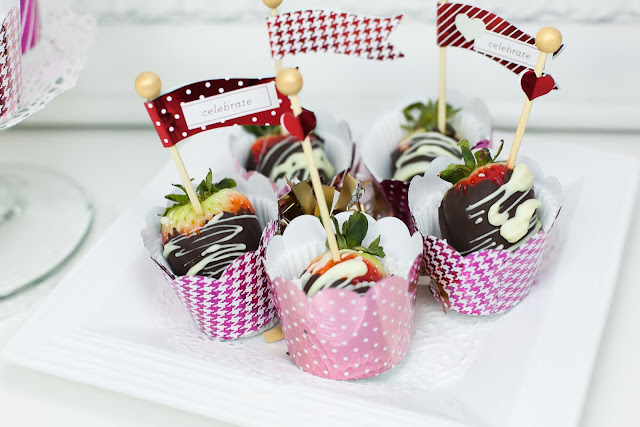
say hello to chocolate covered strawberries.
total and complete valentines day classic, right?!?


instead of just simply adding these strawberries to a platter, i thought they would look super cute nestled inside the minc cupcake wrappers.


i transformed the wrappers using light pink and hot pink foil.
once complete, i secured them and then placed my strawberries inside each wrapper.
i finished it off with the super cute foiled pennant detail, both in red and hot pink.


how fun would these strawberries be to deliver as a lovely little valentine surprise?  think family member, co-worker or friend.  the foiled cupcake wrappers are just gorgeous as not only the finishing touch but also beautiful packaging as well.


last, but certainly not least...I added some minc touches to my marquee love heart.
to create my red polka dot marquee heart, i simply used the 12x12 minc paper from the 5th avenue minc collection.
i added red foil onto the paper, and ran through my minc.
i then traced the heart template onto that paper and simply inserted into my marquee heart.


inserted the bulbs and voila!
seriously the cutest little marquee detail....transformed with some minc metallic shine.
i love this red polka dot heart!


i absolutely love using my minc to transform all of it's amazing products to fit any season, party or holiday of the year.  i really think that is part of the fun and magic of it all!
completely customizable to fit any occasion.  nothing better than that.
all of these products i used are now available at michaels.... i know you will love them as much as i do.

happy love day everyone!
xoxo


1

light it up. 2016, my one little word & marquee love.

there is truly nothing more powerful than making something you are working toward visible in your life.  when you can actually SEE something, is where i believe the magic really begins to happen.

2016 for me is the year of FAITH.
i want to work on cultivating more faith into my daily life.  into my thoughts.  into my worries.  into my parenting. into myself.
i really believe that with faith, anything is possible.  
worries become a lot less weighted.  dreams seem within reach.  fears are comforted.  my heart feels at peace. the future seems a lot less scary.


now, say hello to some brand new heidi swapp marquee love.
gorgeous right?
part of making my word happen for me this year, like i said before is making it visible.  and with lights.  truly a power couple match made in heaven.


say hello to FAITH. 
2016.
marquee love style.
i am in LOVE.


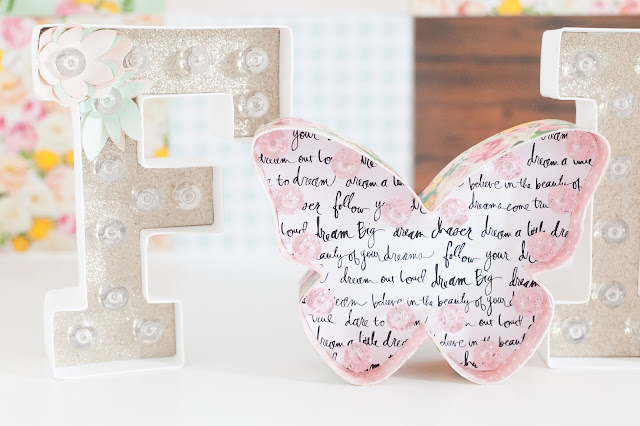
i had a lot of fun combining both the letters and the new shapes to make my word come to life.  in replace of the 'a' i used this gorgeous new butterfly.  truly symbolic of transformation, belief, resilience...all things that rely on faith to make happen.  i love it.


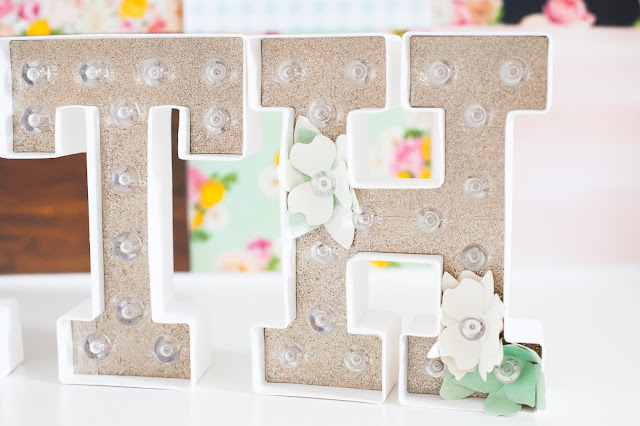
you may also notice some gorgeous floral pieces tucked in both the "f" and the "h" of my marquee as well.  these are also new.  they are gorgeous paper flowers that come in a rainbow of pastel shades.  they are SO easy to place into the marquee.  simply feed the bulb through the centre of the flowers and then pop them right back into your letter.  awesome, right?!?

ok...so let's also talk glitter.


some people love it....others, well....not so much.
but regardless it does look amazing.
well, i want to share a fun and VERY easy tip for adding glitter into your marquee shapes ... even if you have a major love/hate with using the stuff!

so...if you have purchased marquee love shapes before, then you know they come basic white with a white letter template inside.


so what i chose to do this time around, was create glittered alpha inserts.  i could have used the loose glitter (which i LOVE), but instead i chose to use the marquee love glitter tape instead!  think easy to apply, little to NO mess...and still that brilliant glitter effect that we all know and love!


to create the glitter marquee alpha inserts, simply grab a roll of the marquee love glitter tape and some scissors.


trim a section of the tape off and adhere to your letter.
repeat until the entire letter is covered, trimming off the access.  since it is also adhesive on the back you can even fold over the back of your letter too if you like.


repeat until the entire letter is covered, trimming off the access.  since it is also adhesive on the back you can even fold over the back of your letter too if you like.

super simple and easy to do.
repeat for all of your desired shapes and letters.


then once you are complete, voila! beautifully glittered alphas with zero to NO mess!
awesome, right?!?


 you can also see that i chose to mix up the patterns and design for my butterfly shape.  i love doing this to my marquee as it adds a really fun element when displaying my word.


to create my butterfly i added in some of the beautiful paper from the brand new marquee love paper pack, and then added in the gorgeous soft pink faceted marquee bulbs.  i trimmed the outside and inside with all new marquee love washi tapes as well.


once it's all complete, lower the lights and let your word SHINE.
this has to be my favourite part ever.


so here's to 2016.
a brand new year, new word....and LOTS of FAITH...with lights!
xoxo
1

say it in lights! birthday wishes done right....with lightbox!

to say i am excited over the brand new release of heidi swapp's latest product, the "lightbox" would be a definite understatement.  i am seriously OBSESSED with this thing!  it is truly the coolest product and the fact that it is SO multi-purpose makes it even better. who does not love something they can use over and over again? right?!?


today i want to share just how awesome the lightbox is for parties!  specifically, birthdays!  the brilliant thing about the light box is that it comes with a full line of accessories, phrases and letters to completely customize what you are wanting.  


i used the 'happy' and 'birthday' words (that come just as is) to create this fun sign.  basic, simple...yet wow factor all the way!  so cute right?  there are also a ton of little icons that you can get as well.  i love how cute these little birthday balloons are.  the perfect little touch.

to place them in the sign...all you do is literally slide them in from the side.
SO easy!


place the finished light box on a cake table...and you have a beautiful accompaniment to wow your guests and guest of honour on their special day!


like i said before....the sayings, designs, and messages are endless.  here are a few other designs i was playing around with.  these would look great for a birthday party, don't you think?


i love the sentiment, 'make a wish'.  ahhh..... i added the cute little icons below it. again....they just slide right in. super easy to add, switch and change out!


and just because you are using it for a birthday, doesn't always mean it has to be a birthday message.  adding a well wish, quote or blessing is another great way to use your light box for parties.  the 'shine bright' and 'today' come as is...so again, they just slide right in.  i added the fun emoji's to the bottom row.  again, even though these are not "technically birthday" they still work when placed along side a sweet sentiment.  SO many uses....so many ways to create a beautiful sign for a loved one's birthday decor.

i know i will be using my light box a ton this year.  what a great way to begin 2016!

0
Back to Top